Are you looking for ways to backup Android Call Logs/Android Call History? Then we got you covered, here in this tutorial we are going to show you different ways to back up Call Logs on Android. Some methods in this tutorial are more convenient than others, follow the one which you find best suitable for you to take a backup of call history on Android.
Note: Different Android OEM manufacturers organize and name settings differently. So, some step-by-step instructions may vary for your smartphone.
How to Backup and Restore Call Logs on Android
We have shared two methods using which you can backup and restore Android call logs. One of the methods involves backup of Android Call History to Google Drive, and other includes the use of a third-party app called Super Backup & Restore.
Let’s proceed with the first method and take the backup of call history on Android to Google Drive.
Backup Android Call History to Google Drive
This method is one of the easiest ways to backup Android Call Logs. It doesn’t involve any app installation or tedious process. If you decide to use this method, then it will automatically take the periodic backup of your call logs and save it to Google drive.
Below are the steps to backup Android Call Logs to Google Drive.
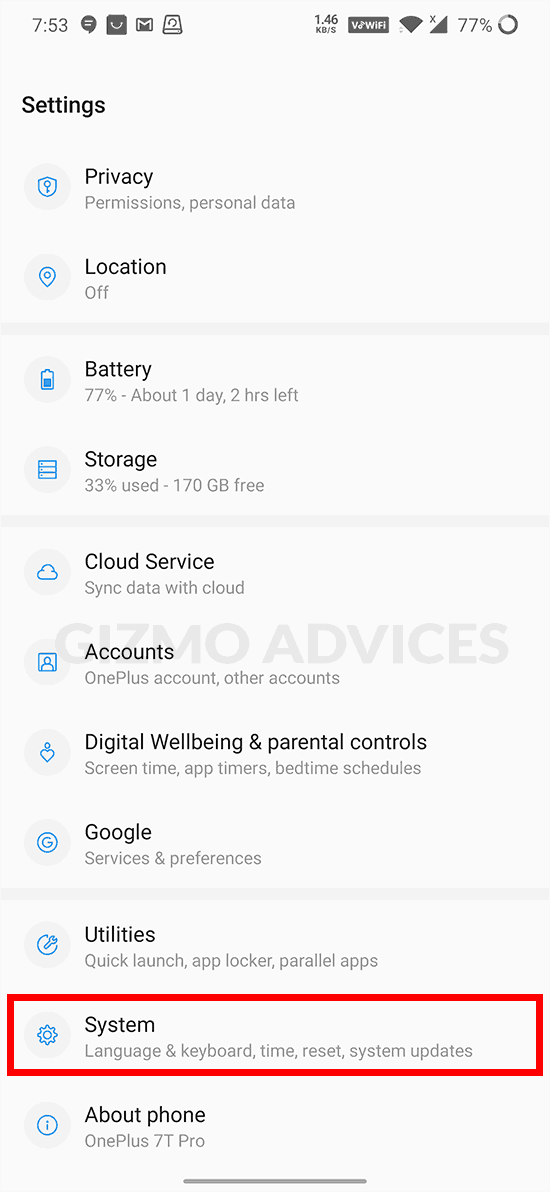
- On your Android phone, go to Settings.
- Scroll down and select the System option.
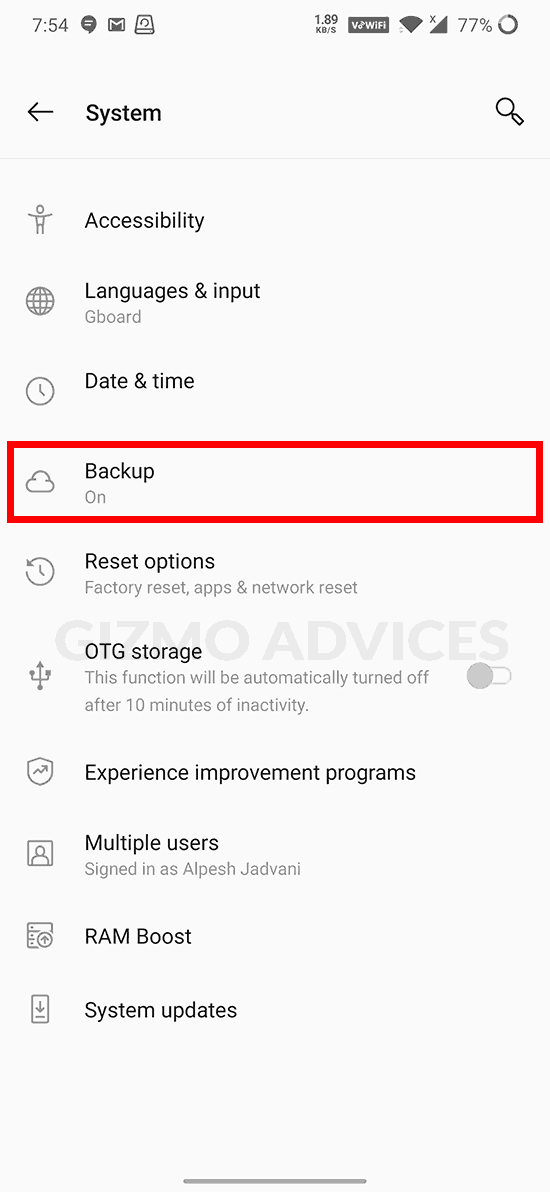
- Look for Backup option and select it.
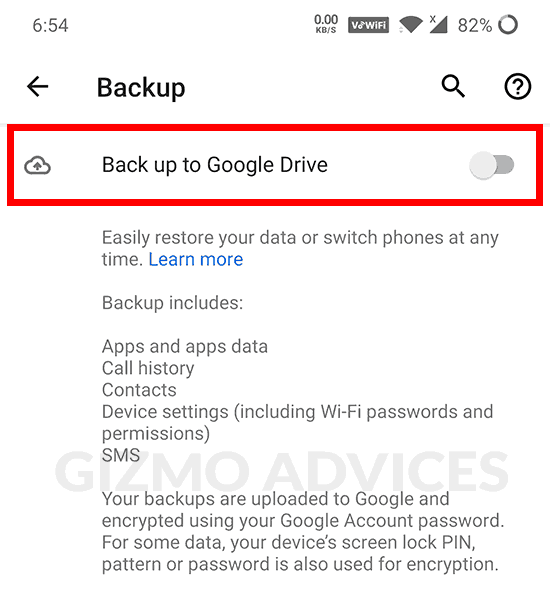
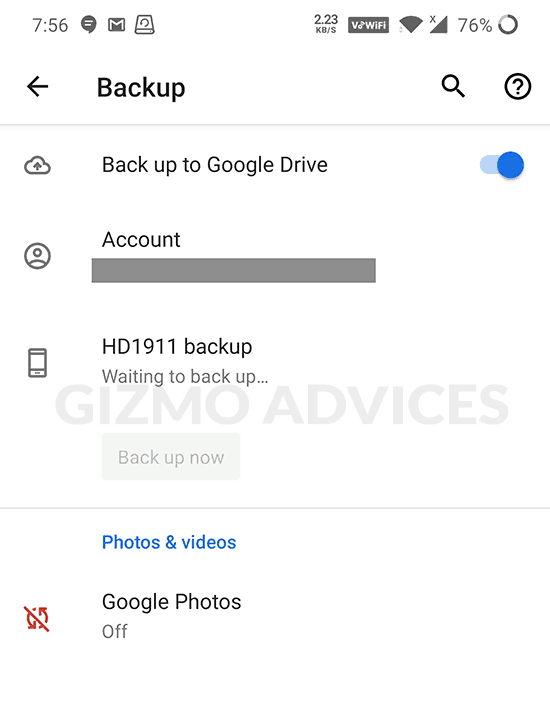
- Enable Back up to Google Drive option.
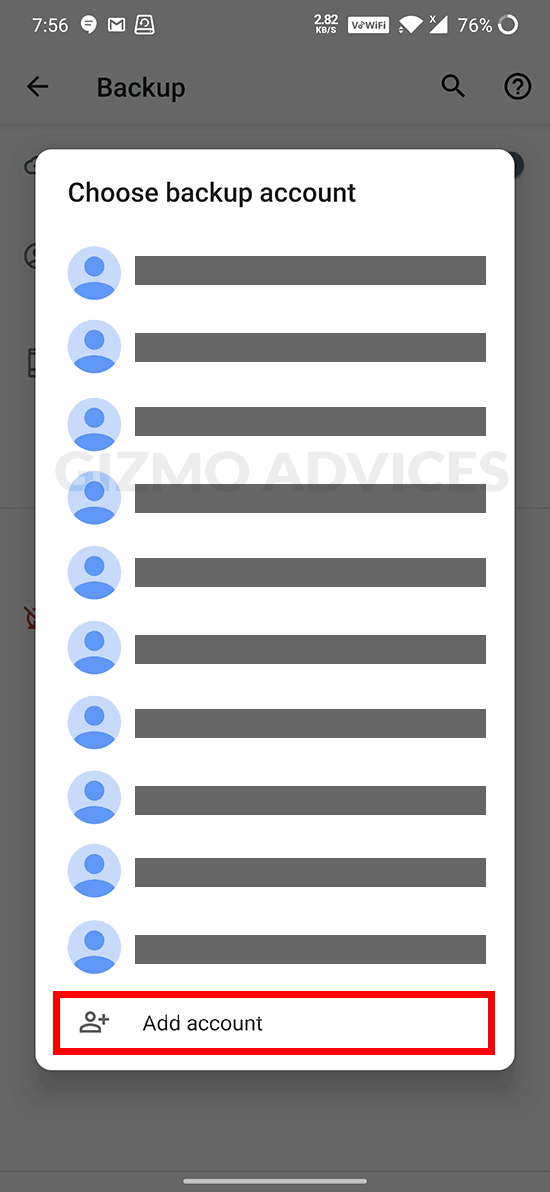
- Now, tap on Account and select the Google Account to which you want to take backup. You can also add a new account using the Add account option.
- Now your call logs/call history will be back up to Google Drive automatically.
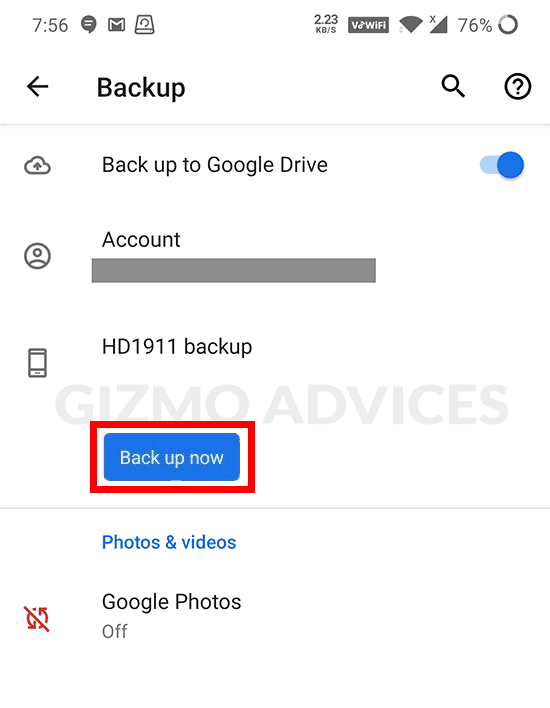
- If you want to back up your data to Google Drive manually, then tap on the Back up now button.
After you have followed the above process, your call logs and other data will be periodically back up to Google Drive.
Restore Android Call History from Google Drive
If you have bought a new phone and want to restore your call logs, then follow the below steps to restore Android call logs from Google Drive.
- Power on your new Android phone, you will be presented with the Android setup process.
- During the setup process if asked to connect to Wi-Fi, then choose and connect to your Wi-Fi network.
- In the next screen, you are asked to sign in to the Google account. Sign in to the same Google account to which you have taken a backup of your call history.
- Continue through the setup process until you’re asked to choose a backup that you want to restore.
- When prompted to select the data you want to restore, select all options and click on RESTORE.
- Now, all your data will be restored to the new phone.
Backup Android Call Logs using Super Backup & Restore App
There are several third-party apps available to backup Android call logs among them Super Backup & Restore is the most popular.
- Download the Super Backup & Restore app on your phone.
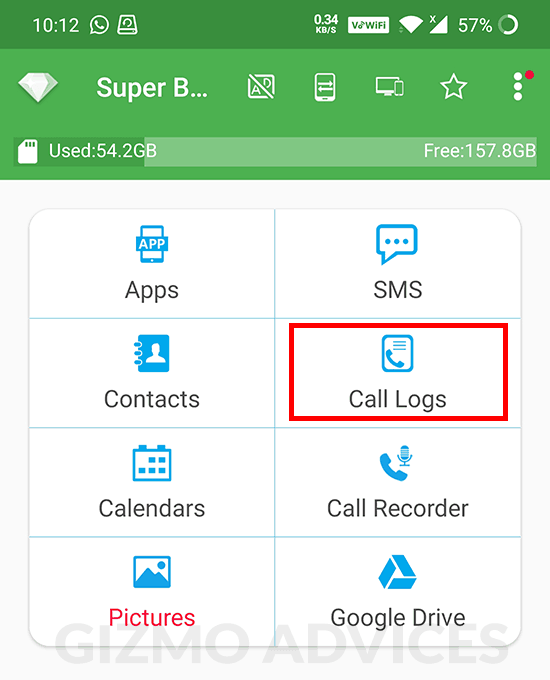
- Once installed, open the app and tap on Call Logs.
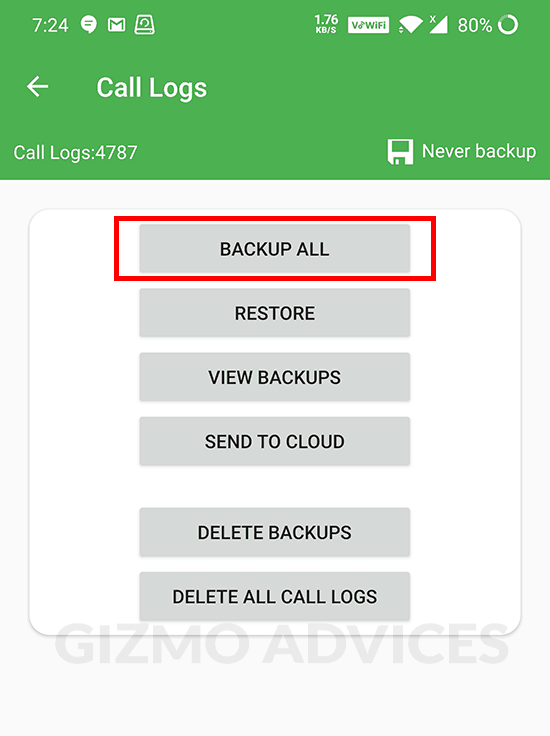
- Now, select BACKUP ALL to back up all of your call logs.
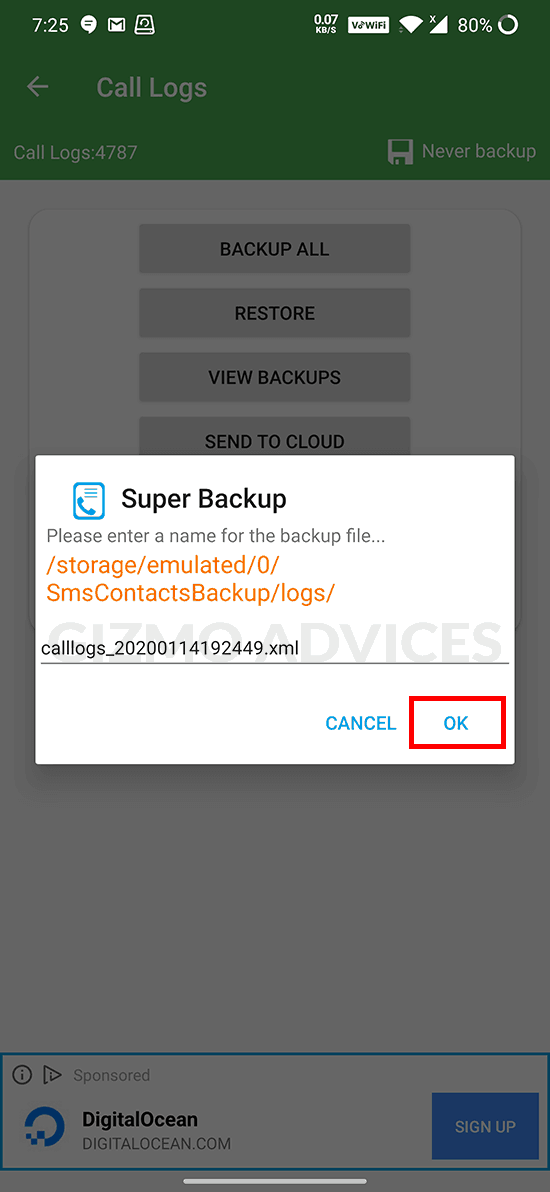
- Now, enter a name for the backup file and tap on OK.
- The backup will be saved as .xml file inside SmsContactsBackup -> Logs folder on your internal storage.
Restore Android Call Logs using Super Backup & Restore App
To restore Android Call History using Super Backup & Restore app, you have to copy or transfer the SmsContactsBackup folder to your new phone.
Once you have transferred the SmsContactsBackup folder to your new phone, follow the below steps to restore your call history.
- Open the Super Backup & Restore app on your phone.
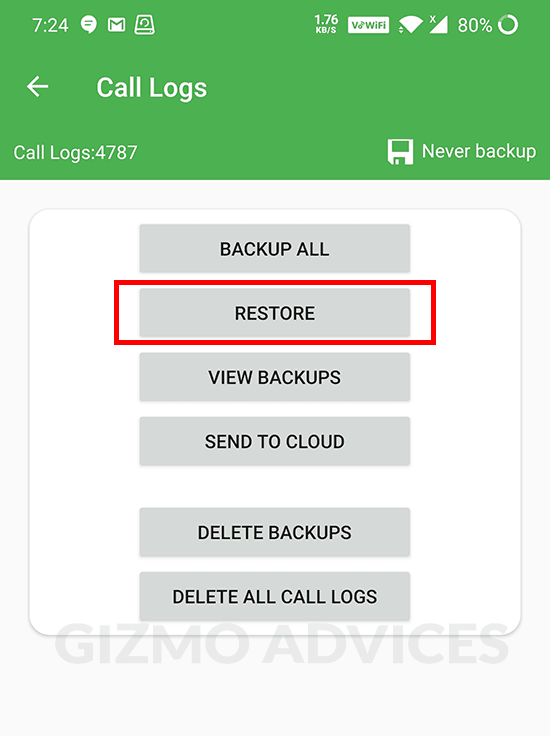
- Select Call Logs and tap on RESTORE.
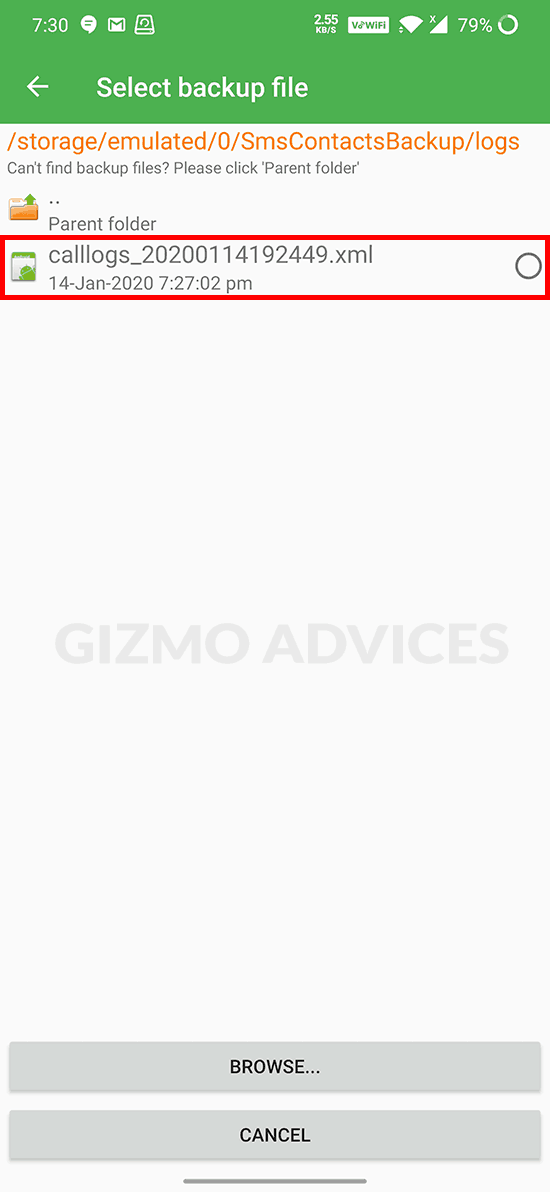
- Now, select the call logs .xml file from SmsContactsBackup -> Logs folder.
- Wait for the process to restore your call logs on your new phone.
These were the two methods using which you can backup and restore call history on Android. Do let us know which of the above methods is convenient for you in the comment section below.
This page may contain affiliate links so we earn a commission. Please read our affiliate disclosure for more info.

JOIN THE DISCUSSION: