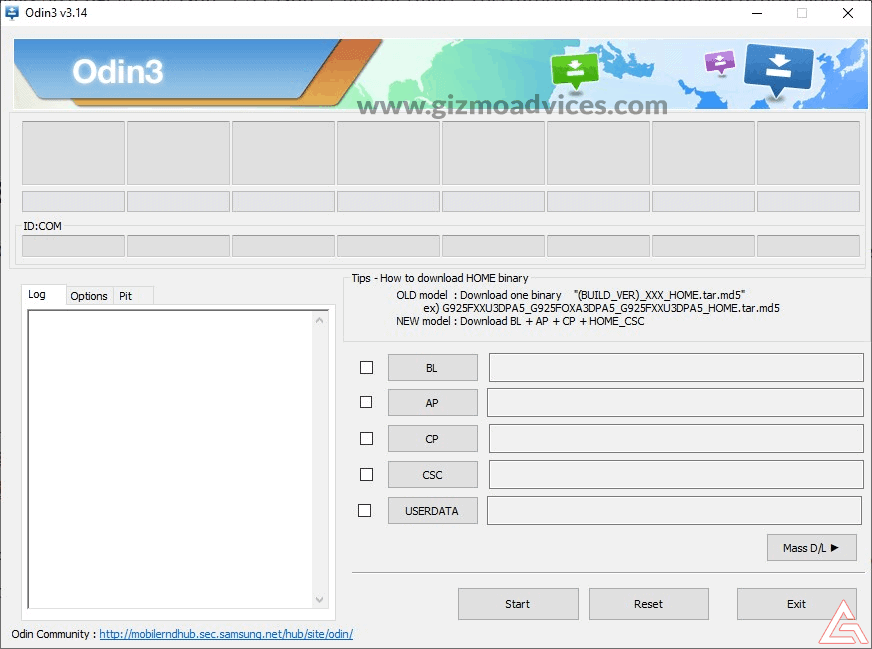
Samsung Galaxy devices are rooted using Odin software, and this software also helps in installing Custom Recovery and Firmware files. Odin flash tool can only be used with Samsung Galaxy devices, and in this guide, we will show you how to use Odin to install CF-Auto Root, Recovery, and firmware files.
Before we proceed to the instructions, you have to follow some pre-requisites to prepare your Samsung Galaxy device and also to avoid interruptions.
Pre-requisites
- Backup all the necessary data before you proceed, as this step, might help you in recovering your data in case of data loss.
- Backup and Restore Call Logs
- Backup and Restore Contacts
- Backup and Restore SMS
- Backup files stored on Internal Storage to your PC
- Charge your device to at least 75%, as it avoids shutdown in-between the process.
- Enable USB Debugging on your device.
- Download and install USB Drivers suitable for your device on the PC.
- Unlock Bootloader in case of locked Bootloader as installing CF-Auto Root on locked Bootloader devices may brick your device.
- Kill PC Suits like Samsung Kies so that they won't interfere with Odin Software.
Disclaimer
We should not be held liable or responsible in any manner for any damage occurred to your Samsung Galaxy device. So, understand the risk involved and proceed at your own risk.
Download Odin Latest Version
How to use Odin to Flash Stock Firmware, Recovery, and CF-Auto Root
- Download the Odin software from the above links.
- Download the required files, it may be either CF-Auto Root or Recovery or Firmware files.
- Run Odin as administrator on PC.
- Power off your device and boot into Odin Mode / Download Mode by pressing and holding Volume Down + Home + Power button until you see warning text onscreen. Now press Volume Up or Power button as written in the Warning message to enter into Download Mode. This step varies from device to device. So, Google for how to boot your device into download mode.
- Connect your device to PC using OEM data cable.
- Now in Odin, you will see that under ID:COM color changes to either blue or yellow, depending on your Odin version. It also mentions the COM Port. This indicates that your device is successfully connected to PC. Additionally, you will see Added!! message under the Message section in Odin.
- If you are going to install CF-Auto Root, then click on AP or PDA and choose the CF-Auto Root files, which is in
.tar.md5format. - If you are flashing Custom Recovery, then you have to choose the recovery image in
.imgor.tarformat. - If you are flashing the firmware files then choose the files as shown below:
- Click on 'AP' or 'PDA' and choose the file with 'AP' in its name or choose the file which is large in size.
- Click on 'CP' or 'Modem' and select the file with 'MODEM' in its name. Ignore this step if no such file exists.
- Click on 'CSC' and select the file with 'CSC' in its name. Ignore this step if no such file exists.
- Click on 'PIT' and select the '.pit' file. Ignore this step if no such file exists.
- Click on 'BL' or 'Bootloader' and select the file with 'BL' in its name. Ignore this step if no such file exists.
- Now check Auto Reboot and F.Reset time and un-check all the remaining options. Check Re-Partition only if you have selected the PIT file.
- Once all the above steps are done, hit the START button to begin the flashing process.
- Once the flashing process is done, you will see PASS! Or RESET! Message in Odin and your device will reboot automatically.
- Unplug your device from PC, only when you see PASS! Or RESET! Message.
Note
If you see, FAIL! Message in Odin, then unplug and remove the battery and reinsert and start the above process again. If the problem persists, then try later after changing the USB data cable.
That's all for now. Now you can install CF-Auto Root, Recovery, and Firmware files on Samsung Galaxy device using Odin software.
If you have any queries, then post them in the comment section below.
Also, share this valuable information with your friends on social networking sites.
This page may contain affiliate links so we earn a commission. Please read our affiliate disclosure for more info.


As far as I know I’m doing everything as per your guidance but I’m constantly getting the \FAIL\ result, please help.
Make sure you are using the correct firmware or Rooting package and also try using the OEM cable.
Failed with samsung galaxy a7, model sm-a7000, chinese version. pls any help
CF Autoroot works fine and gives me root on my Galaxy tab pro 8.4, but it lasts only till I shut the device off. When turned on, root is gone. Any thoughts please?
Thanks.
Please help i need fix.
On s6 edge sm-g925v.
Im getting an error saying dm verify fail check drk.
Can anyone help me.